本页有简体中文版

切换到简体中文

이 페이지는 한국어 버전도 있어요

한국어 버전으로 보기

Buling Build & Best Teams

  • Electro
  • Rectifier
  • Healer

Buling is an A-tier Electro Support in 3.8. Best team: Hsin / Rover (Electro) / Buling.

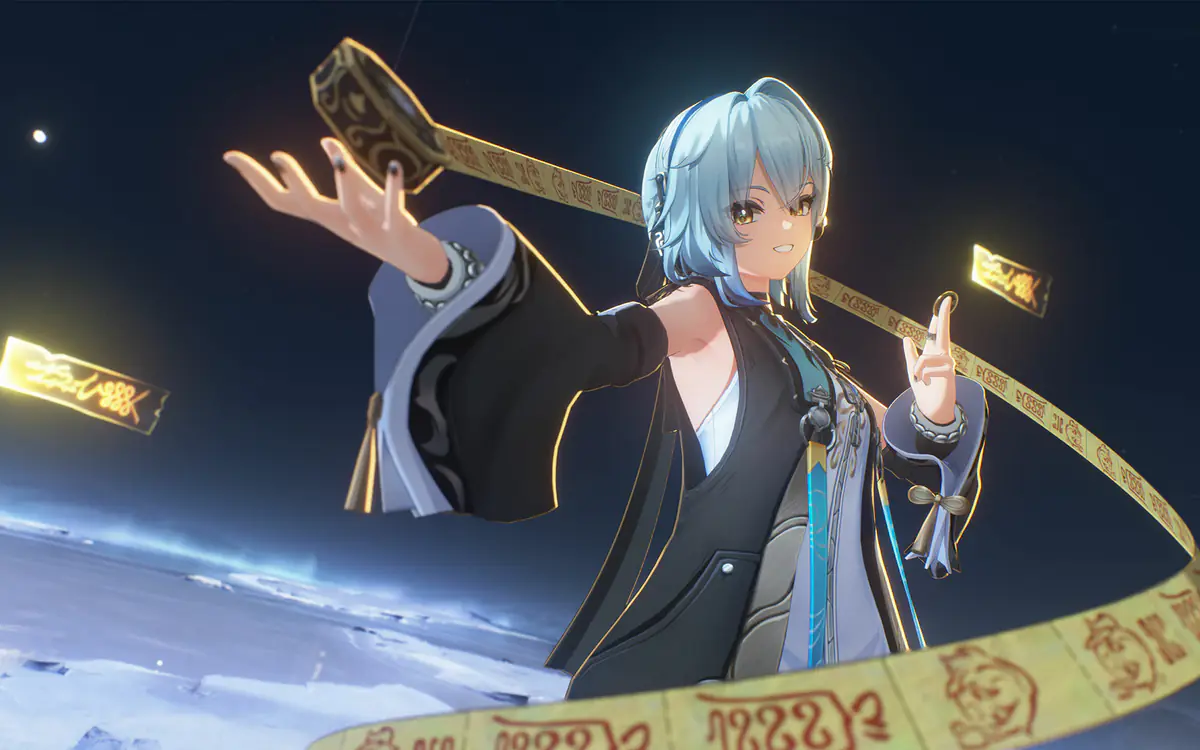
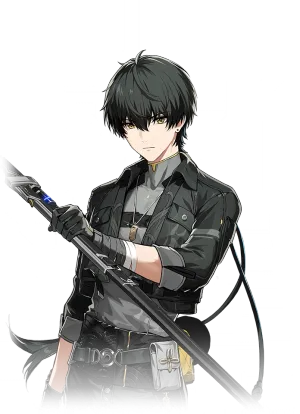
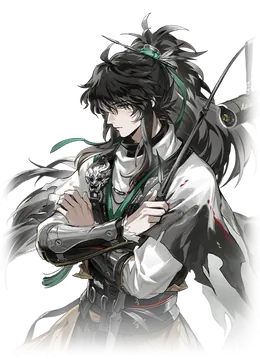
Taoist of Mengzhou, Black Shores Consultant, feng shui master, and veteran forum dweller. Easygoing and well-traveled, Buling will "bling" whatever you seek.

Updated for 3.8 ·

Buling, Wuthering Waves Resonator

Buling Build at a Glance

  • Rejuvenating Glow5-pc
  • Main EchoFallacy of No Return
Main stats
  • Cost 4Healing Bonus
  • Cost 3Energy Regen/ATK%
  • Cost 1ATK%
  1. Variation
  2. Cosmic Ripples
  3. Stringmaster
  1. Forte Circuit10before or with
  2. Normal Attack10before
  3. Resonance Liberation8before or with
  4. Intro Skill8before or with
  5. Resonance Skill6

Best Buling Teams

F2P-friendly Resonators: any 4★, Rover, or one of the standard 5★ (Verina, Encore, Calcharo, Lingyang, Jianxin) from the Beginner's Choice Convene.

More teams with Buling

  1. A tier, Estimated from main DPS tier

    Phrolova / Cantarella / Buling

    2 guides
  2. A tier, Estimated from main DPS tier

    Phrolova / Danjin / Buling

    2 guides
  1. B tier, Estimated from main DPS tier

    Carlotta / Zhezhi / Buling

    2 guides
  1. C tier, Estimated from main DPS tier

    Jinhsi / Zhezhi / Buling

    2 guides
  2. C tier, Estimated from main DPS tier

    Jinhsi / Cantarella / Buling

    1 guide

How to Play Buling

Role

  • Heal and grant DMG Bonus to Resonators in the team.

  • Resonance Liberation continuously stacks Electro Flare on the target.

  • When Resonance Liberation is active, any Resonator in the team casting Intro Skill grants DMG Buffs to Resonators in the team.

Skills

Basic Attack

Hexagram Calls, Lightning Falls

Basic Attack

Perform up to 4 consecutive attacks, dealing Electro DMG.

Heavy Attack - Mountain Over Thunder

Hold Normal Attack to consume the highlighted Trigram - Mountain and Trigram - Thunder from left to right and cast Heavy Attack - Mountain Over Thunder, dealing Electro DMG.

Heavy Attack - Thunder Over Mountain

Hold Normal Attack to consume the highlighted Trigram - Thunder and Trigram - Mountain from left to right and cast Heavy Attack - Thunder Over Mountain, dealing a small amount of Electro DMG and additionally reducing the target's Vibration Strength.

Heavy Attack - Twin Mountains

Hold Normal Attack to consume the highlighted 2 Trigrams - Mountain from left to right and cast Heavy Attack - Twin Mountains, healing all nearby Resonators in the team.

Heavy Attack - Twin Thunders

Hold Normal Attack to consume the highlighted 2 Trigrams - Thunder from left to right and cast Heavy Attack - Twin Thunders, healing all nearby Resonators in the team once per second for 8s.

Heavy Attack - Ghost Gate Omen

When holding Normal Attack with fewer than 2 Trigrams, Buling fails the divination, becoming temporarily immobilized and losing all Trigrams and 20% of her current HP. This effect will not consume HP if Buling's current HP is below 1%.

Mid-air Attack

Consume STA to perform Mid-air Attack, dealing Electro DMG.

Dodge Counter

Press Normal Attack right after a successful Dodge to perform Basic Attack Stage 3, dealing Electro DMG.
- After performing Dodge Counter, press Normal Attack to perform Basic Attack Stage 4.

Trigram

Buling can hold up to 4 Trigrams. When Trigrams reach the max number, gaining new Trigrams moves all Trigrams 1 slot to the left, and the original leftmost Trigram will be removed.
- Trigram - Mountain is obtained when Basic Attack Stage 2 deals damage.
- Trigram - Thunder is obtained when Basic Attack Stage 4 or Mid-air Attack deals damage.
- Trigram - Thunder is obtained when casting Resonance Skill - In Shadow Thunder Stirs.


Buling Skill Priority

Buling's kit centers on her Forte Circuit: Flashing Thunder Spell: Harmony creates the Five Thunders Spell Array, which keeps applying Electro Flare and grants Resonance Skill DMG Bonus to the team. Her Basic Attack holds the special Heavy Attacks, including the heals from Mountain and Thunder trigrams, so max both first. Liberation and Intro go to level 8, Resonance Skill to 6.

Buling build guides

  • Official guide · Void EnigmaLink Updated 2026-07
  • Official guide (CN) · 羊亐Link Updated 2026-07
  • Official guide (CN) · 一戈Link Updated 2026-07
  • Official guide (CN) · KinLink Updated 2026-07
  • Official guide (JP) · WW EchoesLink Updated 2025-12
  1. FirstTime Arrives, Evil DeclinesInherent Skill
  2. FirstEarthly Immortal is Here!Inherent Skill
  3. Lv.10Thunder Begets LifeForte Circuit
    before or with
  4. Lv.10Hexagram Calls, Lightning FallsNormal Attack
    before
  5. Lv.8Flashing Thunder SpellResonance Liberation
    before or with
  6. Lv.8Summon and SmiteIntro Skill
    before or with
  7. Lv.6In Shadow Thunder StirsResonance Skill

Inherent Skills unlock with Ascension, so get them first. Tune Break has no levels.

Buling Endgame Stats

Buling keeps her buffs up through Flashing Thunder Spell: Harmony, and her Liberation costs 150 Resonance Energy, so she aims for about 165% Energy Regen and favors Energy Regen on the 3-cost slots. Her heals scale with ATK, so once Energy Regen is covered the remaining substats go into ATK%. Crit stats do little for her.

Buling build guides

  • Official guide · Void EnigmaLink Updated 2026-07
  • Official guide (CN) · 羊亐Link Updated 2026-07
  • Official guide (CN) · 一戈Link Updated 2026-07
  • Official guide (CN) · KinLink Updated 2026-07
  • Official guide (JP) · WW EchoesLink Updated 2025-12

Recommended stats at Lv.90

StatTarget
Energy Regen≥165%
ATK≥2100
Crit. Rate≥5%
Crit. DMG≥150%
Healing Bonus≥48.4%

Buling Ascension Materials

Total from Lv.1 to 40:

  • LF Whisperin Core

    Weapon and Skill Material · ×4Where to get
    • Supply Pack
    • Synthesis - Conversion
    • Whisperins
    • Item Exchange
    • Forgery Challenge
    • Weapon Shop

Shell Credit5,000

Total from Lv.1 to 50:

  • LF Whisperin Core

    Weapon and Skill Material · ×4Where to get
    • Supply Pack
    • Synthesis - Conversion
    • Whisperins
    • Item Exchange
    • Forgery Challenge
    • Weapon Shop
  • Blighted Crown of Puppet King

    Resonator Ascension Material · ×3Where to get
    • The False Sovereign
    • The False Sovereign - Early Access
  • Pecok Flower

    Ascension Material · ×4Where to get
    • Supply Pack
    • Overworld Collection
    • Collection Spots
    • Taoyuan Vale
    • Shifang Pharmacy
    • Synthesis - Bioprinting
  • MF Whisperin Core

    Weapon and Skill Material · ×4Where to get
    • Supply Pack
    • Synthesis - Purification
    • Synthesis - Conversion
    • Whisperins
    • Forgery Challenge
    • Weapon Shop

Shell Credit15,000

Total from Lv.1 to 60:

  • LF Whisperin Core

    Weapon and Skill Material · ×4Where to get
    • Supply Pack
    • Synthesis - Conversion
    • Whisperins
    • Item Exchange
    • Forgery Challenge
    • Weapon Shop
  • Blighted Crown of Puppet King

    Resonator Ascension Material · ×9Where to get
    • The False Sovereign
    • The False Sovereign - Early Access
  • Pecok Flower

    Ascension Material · ×12Where to get
    • Supply Pack
    • Overworld Collection
    • Collection Spots
    • Taoyuan Vale
    • Shifang Pharmacy
    • Synthesis - Bioprinting
  • MF Whisperin Core

    Weapon and Skill Material · ×12Where to get
    • Supply Pack
    • Synthesis - Purification
    • Synthesis - Conversion
    • Whisperins
    • Forgery Challenge
    • Weapon Shop

Shell Credit30,000

Total from Lv.1 to 70:

  • LF Whisperin Core

    Weapon and Skill Material · ×4Where to get
    • Supply Pack
    • Synthesis - Conversion
    • Whisperins
    • Item Exchange
    • Forgery Challenge
    • Weapon Shop
  • Blighted Crown of Puppet King

    Resonator Ascension Material · ×18Where to get
    • The False Sovereign
    • The False Sovereign - Early Access
  • Pecok Flower

    Ascension Material · ×24Where to get
    • Supply Pack
    • Overworld Collection
    • Collection Spots
    • Taoyuan Vale
    • Shifang Pharmacy
    • Synthesis - Bioprinting
  • MF Whisperin Core

    Weapon and Skill Material · ×12Where to get
    • Supply Pack
    • Synthesis - Purification
    • Synthesis - Conversion
    • Whisperins
    • Forgery Challenge
    • Weapon Shop
  • HF Whisperin Core

    Weapon and Skill Material · ×4Where to get
    • Supply Pack
    • Synthesis - Purification
    • Synthesis - Conversion
    • Whisperins

Shell Credit50,000

Total from Lv.1 to 80:

  • LF Whisperin Core

    Weapon and Skill Material · ×4Where to get
    • Supply Pack
    • Synthesis - Conversion
    • Whisperins
    • Item Exchange
    • Forgery Challenge
    • Weapon Shop
  • Blighted Crown of Puppet King

    Resonator Ascension Material · ×30Where to get
    • The False Sovereign
    • The False Sovereign - Early Access
  • Pecok Flower

    Ascension Material · ×40Where to get
    • Supply Pack
    • Overworld Collection
    • Collection Spots
    • Taoyuan Vale
    • Shifang Pharmacy
    • Synthesis - Bioprinting
  • MF Whisperin Core

    Weapon and Skill Material · ×12Where to get
    • Supply Pack
    • Synthesis - Purification
    • Synthesis - Conversion
    • Whisperins
    • Forgery Challenge
    • Weapon Shop
  • HF Whisperin Core

    Weapon and Skill Material · ×12Where to get
    • Supply Pack
    • Synthesis - Purification
    • Synthesis - Conversion
    • Whisperins

Shell Credit90,000

Total from Lv.1 to 90:

  • LF Whisperin Core

    Weapon and Skill Material · ×4Where to get
    • Supply Pack
    • Synthesis - Conversion
    • Whisperins
    • Item Exchange
    • Forgery Challenge
    • Weapon Shop
  • Blighted Crown of Puppet King

    Resonator Ascension Material · ×46Where to get
    • The False Sovereign
    • The False Sovereign - Early Access
  • Pecok Flower

    Ascension Material · ×60Where to get
    • Supply Pack
    • Overworld Collection
    • Collection Spots
    • Taoyuan Vale
    • Shifang Pharmacy
    • Synthesis - Bioprinting
  • MF Whisperin Core

    Weapon and Skill Material · ×12Where to get
    • Supply Pack
    • Synthesis - Purification
    • Synthesis - Conversion
    • Whisperins
    • Forgery Challenge
    • Weapon Shop
  • HF Whisperin Core

    Weapon and Skill Material · ×12Where to get
    • Supply Pack
    • Synthesis - Purification
    • Synthesis - Conversion
    • Whisperins
  • FF Whisperin Core

    Weapon and Skill Material · ×4Where to get
    • Supply Pack
    • Synthesis - Purification
    • Synthesis - Conversion
    • Whisperins

Shell Credit170,000

Buling Skill Upgrade Materials

All 5 skills to Lv.10, both Inherent Skills, and all stat nodes:

  • Lento Helix

    Weapon and Skill Material · ×25
  • LF Whisperin Core

    Weapon and Skill Material · ×25Where to get
    • Supply Pack
    • Synthesis - Conversion
    • Whisperins
    • Item Exchange
    • Forgery Challenge
    • Weapon Shop
  • Adagio Helix

    Weapon and Skill Material · ×28
  • MF Whisperin Core

    Weapon and Skill Material · ×28Where to get
    • Supply Pack
    • Synthesis - Purification
    • Synthesis - Conversion
    • Whisperins
    • Forgery Challenge
    • Weapon Shop
  • Andante Helix

    Weapon and Skill Material · ×55
  • HF Whisperin Core

    Weapon and Skill Material · ×40Where to get
    • Supply Pack
    • Synthesis - Purification
    • Synthesis - Conversion
    • Whisperins
  • Curse of the Abyss

    Skill Upgrade Material · ×26
  • Presto Helix

    Weapon and Skill Material · ×67
  • FF Whisperin Core

    Weapon and Skill Material · ×57Where to get
    • Supply Pack
    • Synthesis - Purification
    • Synthesis - Conversion
    • Whisperins

Shell Credit2,030,000

Best Weapons for Buling

The 4-star Variation is her first pick: its Energy Regen substat keeps her Liberation on time, and Resonance Skill casts refund Concerto Energy so her Outro arrives sooner. The standard Cosmic Ripples also grants Energy Regen through its passive, and Call of the Abyss pairs an Energy Regen substat with a healing passive. Buling gains little from damage-focused high-rarity weapons.

Buling build guides

  • Official guide · Void EnigmaLink Updated 2026-07
  • Official guide (CN) · 羊亐Link Updated 2026-07
  • Official guide (CN) · 一戈Link Updated 2026-07
  • Official guide (CN) · KinLink Updated 2026-07
  • Official guide (JP) · WW EchoesLink Updated 2025-12
4★ · Recommended

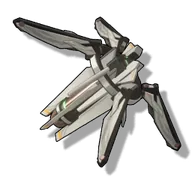
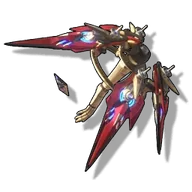
Variation

337.5 ATK at Lv.9051.84% Energy Regen at Lv.90

Ceaseless Aria

When Resonance Skill is cast, restores 8/10/12/14/16 Concerto Energy. This effect can be triggered 1 times every 20s.

Alternatives

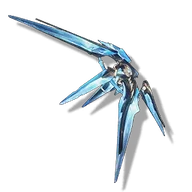
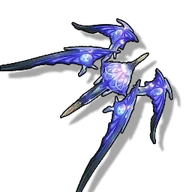
Cosmic RipplesStandard 5★
500 ATK at Lv.9054% ATK at Lv.90

Stormy Resolution

Increases Energy Regen by 12.8%/16%/19.2%/22.4%/25.6%. When dealing Basic Attack DMG, increases Basic Attack DMG Bonus by 3.2%/4%/4.8%/5.6%/6.4%, stacking up to 5 time(s). This effect lasts for 8s and can be triggered 1 time(s) every 0.5s.

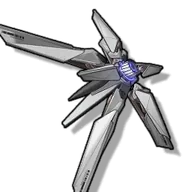
StringmasterLimited 5★
500 ATK at Lv.9036% Crit. Rate at Lv.90

Electric Amplification

Grants 12%/15%/18%/21%/24% Attribute DMG Bonus. When dealing Resonance Skill DMG, increases ATK by 12%/15%/18%/21%/24%, stacking up to 2 times. This effect lasts for 5s. When the wielder is not on the field, increases their ATK by an additional 12%/15%/18%/21%/24%.

Call of the Abyss4★
337.5 ATK at Lv.9051.84% Energy Regen at Lv.90

Pole of the Celestial Dome

Casting Resonance Liberation increases the Resonator's Healing Bonus by 16%/20%/24%/28%/32% for 15s.

Fusion Accretion4★
462.5 ATK at Lv.9018.23% ATK at Lv.90

Intergalactic Gaze

Casting the Resonance Skill grants 6/7/8/9/10 Resonance Energy and increases ATK by 10%/12.5%/15%/17.5%/20%, lasting for 16s. This effect can be triggered once every 20s.

Best Echoes for Buling

5-pc Rejuvenating Glow gives the team 15% ATK whenever Buling heals, and her Intro, special Heavy Attacks and Outro all heal, so the buff stays up. Fallacy of No Return adds Energy Regen and team ATK as the main Echo; Bell-Borne Geochelone swaps in when a shield matters more. Main stats: Healing Bonus on 4-cost, Energy Regen or ATK% on 3-cost.

Buling build guides

  • Official guide · Void EnigmaLink Updated 2026-07
  • Official guide (CN) · 羊亐Link Updated 2026-07
  • Official guide (CN) · 一戈Link Updated 2026-07
  • Official guide (CN) · KinLink Updated 2026-07
  • Official guide (JP) · WW EchoesLink Updated 2025-12

Recommended

Main Echo
  • Fallacy of No ReturnCost 4
Sonata Effect
  • Rejuvenating Glow5-pc

Alternative

Main Echo
  • Bell-Borne GeocheloneCost 4
Sonata Effect
  • Rejuvenating Glow5-pc

Main stats

Cost setup4-3-3-1-1
  • Cost 4Healing Bonus
  • Cost 3Energy RegenorATK%
  • Cost 1ATK%

Substats

  1. Energy Regen
  2. thenATK%
  3. thenATK

Buling Resonance Chain

Buling already heals, applies Electro Flare and amplifies team DMG at S0. S2 refunds 25 Resonance Energy when she enters Yin-Yang Balance, lowering her Energy Regen needs. S3 adds an emergency heal for low-HP teammates during the Spell Array. S6 raises the Resonance Skill DMG Bonus from Thunder Spell - Heaven, Earth, Mind to 50%.

Buling build guides

  • Official guide · Void EnigmaLink Updated 2026-07
  • Official guide (CN) · 羊亐Link Updated 2026-07
  • Official guide (CN) · 一戈Link Updated 2026-07
  • Official guide (CN) · KinLink Updated 2026-07
  • Official guide (JP) · WW EchoesLink Updated 2025-12
  1. Resonance Chain 1Exorcist Gadgets, Lend Me Your PowerThe Crit. Rate of Resonance Liberation - Flashing Thunder Spell: Harmony is increased by 20% upon dealing damage.

    The Crit. Rate of Resonance Liberation - Flashing Thunder Spell: Harmony is increased by 20% upon dealing damage.

  2. Resonance Chain 2Talisman Burns, Spirits TurnRecommendedEntering Yin-Yang Balance refunds 25 Resonance Energy, keeping her Resonance Liberation on rotation with lower Energy Regen needs.Buling restores 25 points of Resonance Energy when she enters the Yin-Yang Balance state. This effect is triggered once every 24s.

    Buling restores 25 points of Resonance Energy when she enters the state. This effect is triggered once every 24s.

    Yin-Yang Balance

    When Buling obtains Minor Yin and Minor Yang, she enters the Yin-Yang Balance state, replacing her Resonance Liberation - Flashing Thunder Spell with Resonance Liberation - Flashing Thunder Spell: Harmony.

  3. Resonance Chain 3Summoner of Spirits, Seeker of FateRecommendedDuring Five Thunders Spell Array, a teammate who drops below 50% HP is instantly healed once every 24s, preventing sudden knockouts.While Five Thunders Spell Array lasts, whenever the HP of Resonators in the team drops below 50%, immediately restore their HP by 350+150% of Buling's ATK. This effect can be triggered once every 24s.

    While lasts, whenever the HP of Resonators in the team drops below 50%, immediately restore their HP by 350+150% of Buling's ATK. This effect can be triggered once every 24s.

    Five Thunders Spell Array

    When Five Thunders Spell Array is active, all Resonators in the team enter the Thunder Spell - Primordial Qi state. - While in the Thunder Spell - Primordial Qi state, when any Resonator in the team casts Intro Skill, Thunder Spell - Primordial Qi becomes Thunder Spell - Yin and Yang. - Thunder Spell - Yin and Yang grants 10% Resonance Skill DMG Bonus to active Resonators in the team. When any Resonator in the team casts Intro Skill during this state, Thunder Spell - Yin and Yang becomes Thunder Spell - Heaven, Earth, Mind. - Thunder Spell - Heaven, Earth, Mind grants 25% Resonance Skill DMG Bonus to active Resonators in the team.

  4. Resonance Chain 4Wanderer of Solaris, Blessed by FortuneBuling gains 20% Healing Bonus.

    Buling gains 20% Healing Bonus.

  5. Resonance Chain 5Forum Ban? New Account!Five Thunders Spell Array instantly inflicts another 6 stacks of Electro Flare on all targets within its range upon generation.

    instantly inflicts another 6 stacks of on all targets within its range upon generation.

    Five Thunders Spell Array

    When Five Thunders Spell Array is active, all Resonators in the team enter the Thunder Spell - Primordial Qi state. - While in the Thunder Spell - Primordial Qi state, when any Resonator in the team casts Intro Skill, Thunder Spell - Primordial Qi becomes Thunder Spell - Yin and Yang. - Thunder Spell - Yin and Yang grants 10% Resonance Skill DMG Bonus to active Resonators in the team. When any Resonator in the team casts Intro Skill during this state, Thunder Spell - Yin and Yang becomes Thunder Spell - Heaven, Earth, Mind. - Thunder Spell - Heaven, Earth, Mind grants 25% Resonance Skill DMG Bonus to active Resonators in the team.

    Electro Flare

    - While Electro Flare lasts, it deals periodic Electro DMG to the target. The target loses half of the effect stacks with each instance of damage. - At maximum stacks of Electro Flare, any new stack inflicted becomes stackable Electro Rage. - Electro Rage increases the DMG dealt by the next Electro Flare trigger. This effect is removed once triggered. - Electro Flare and Electro Rage stack up to 10 times by default. The higher the stacks, the more DMG dealt.

  6. Resonance Chain 6"Almighty Forum Lord of Thunder Spell"RecommendedThunder Spell - Heaven, Earth, Mind now grants 50% Resonance Skill DMG Bonus, a large buff for Resonance Skill-focused carries.The Thunder Spell - Heaven, Earth, Mind state now grants 50% Resonance Skill DMG Bonus to the active Resonator in the team.

    The state now grants 50% Resonance Skill DMG Bonus to the active Resonator in the team.

    Thunder Spell - Heaven, Earth, Mind

    Thunder Spell - Heaven, Earth, Mind grants 25% Resonance Skill DMG Bonus to active Resonators in the team.

Current Banners

Buling FAQ

What element and weapon does Buling use?

Buling is a 4-star Electro Support whose weapon type is Rectifier.

What is Buling's best team?

Buling's best team is Hsin / Rover (Electro) / Buling, rated S in Tower of Adversity.

What is Buling's best weapon?

Buling's best weapon is Variation. Alternatives: Cosmic Ripples and Stringmaster.

What are Buling's best Echoes?

We recommend Rejuvenating Glow (5-pc) on Buling, with Fallacy of No Return as the Main Echo.

AI pull planner

Your ResonatorsEdit in Team Builder
Pity and Astrite
Lost your last 50/50?
Pity Calculator